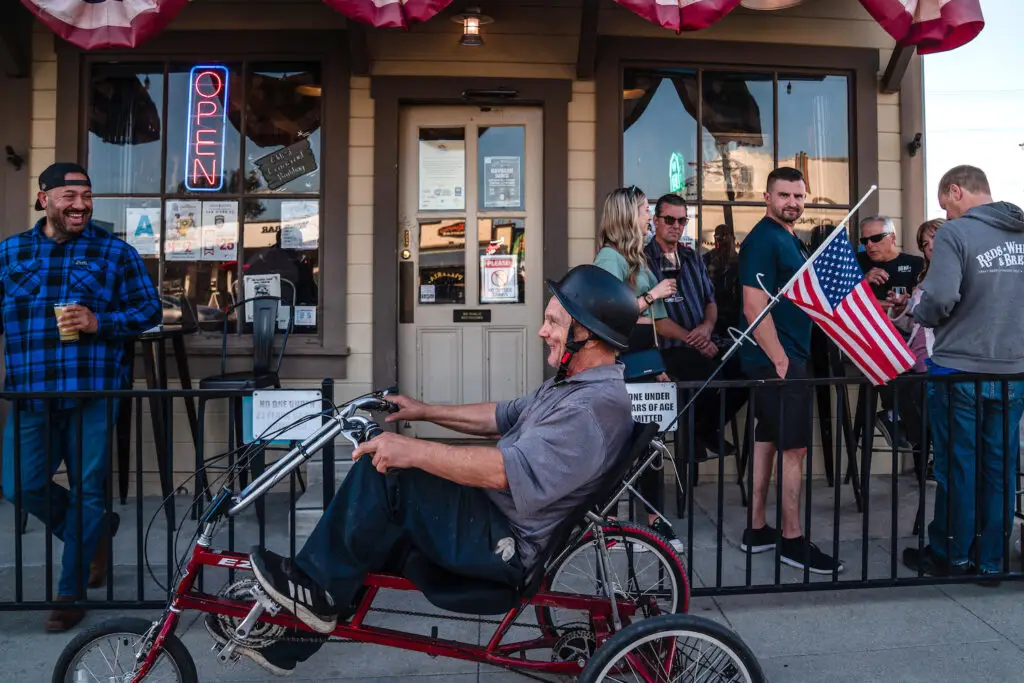
When it comes to kitchen goods, nothing’s buzzier than making sustainable swaps for single-use items. Cynthia Trujillo, owner of Reap & Sow, knows this best. She’s bet most of her Oceanside boutique on this, creating a space dedicated to eco-conscious shoppers. Beeswax wraps, she says, could be considered a gateway into this lifestyle. They’re a reusable, biodegradable food wrap and substitute for single-use plastic wrap, among other storage solutions. And they’re easy enough to make on your own.
“I use them daily,” Trujillo says. She favors beeswax wraps for bread, fruit, vegetables, and to cover leftovers. “They last a long time, about as long as they’re cared for.” Trujillo shares her tips for how to create and care for your own beeswax wraps.
1. Prepare the fabric
Heat your oven to 150–200 degrees and cover a baking sheet with parchment paper. Cut the cotton fabric to the desired size of your beeswax wrap (we suggest 12 inches square to start), and place it on top of the parchment paper.
2. Apply the wax
Grate your beeswax block* over the fabric, or spread your beeswax pellets over it. Either way, make sure to cover the entire surface of the fabric. Pop the baking sheet into the oven for about five minutes or until the wax has fully melted and seeped into all corners of the fabric.
3. Dry the wraps
Remove the wrap from the oven and use the paintbrush to spread the wax evenly across the fabric. Let it cool, then hang to dry, with clothespins and a hanger or by laying it over the back of a non-fabric chair.
4. Care for it gently
Keep the wrap away from heat, especially hot water. In between uses or when necessary—when the wrap absorbs smells or is visibly dirty—hand wash it in cold to lukewarm water and maybe a mild dish soap. Hang to dry or lay it on a flat surface, and store it in a cool, dry place. Also, avoid using it to store food that would require disinfecting the wrap after its use, like uncooked meat.
5. Reuse, revive, and recycle
Once the wrap begins to lose form or the wax builds up in the creases, it’s time to revive it. To do this, place it on parchment paper on a baking sheet, grate a light coat of beeswax over it, and heat it for two to three minutes. Once the wrap has lived a full life, consider cutting it into strips and composting.
*For a more pliable wrap, consider melting your beeswax (1/4 cup) with pine resin (2 tablespoons) and jojoba oil (1 tablespoon)
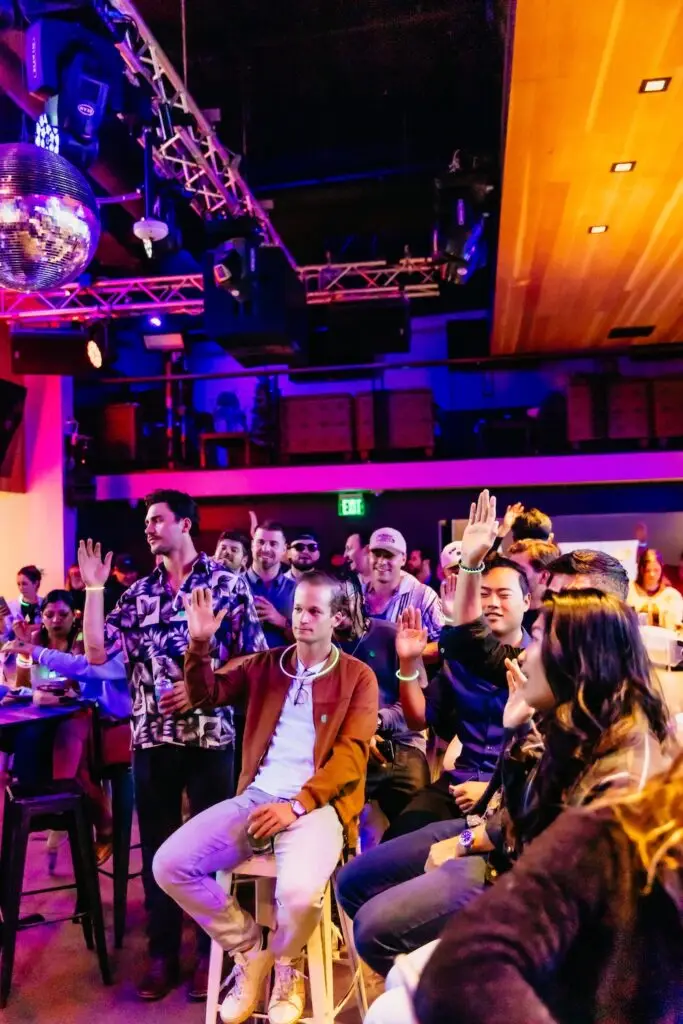
Walking into a room full of strangers isn’t high on the fun index for most. It’s inherently awkward: Everyone’s standing in closed-loop clusters, deep in conversation, and, depending on your social aptitude, the feeling is somewhere between light apprehension and burning alive from the inside out. The pull to retreat or reflexively look busy on your phone is stronger than the drink you now deeply crave. Having friends is nice, but making friends can be brutal.
There’s plenty of commentary on the loneliness epidemic. Last year, the American Psychiatric Association reported that one in three adults feel lonely at least once a week; those aged 18 to 34 are more likely to feel isolated and even more likely to turn to social media as a result. Dr. Vivek Murthy’s “My Parting Prescription for America” cautioned that “being socially disconnected increases our risk of heart disease, dementia, depression, anxiety, and premature death.” So it’s not just an emotional need; it’s nearly nutritional—chit-chat and the occasional wine-fueled, emotional deep-dive are just as important as Pilates and a reasonable amount of kale.
Finding social connections in any city is hard, but San Diego has very specific challenges. This is largely a transient population that acts as a temporary hotspot for many and a permanent home for few. Pick your reason: high rent, surreal gas prices, housing shortage, meh job opportunities (ranked 71st in the country in 2025), or the fact that active military is a sizable chunk of us (110,000-ish)—stationed here for a stretch, then gone. This constant flow of departees sucks out the potential for deeply established families and friend groups, leaving a good share of nomads, searchers, and plenty of people feeling socially awkward.
“There’s an underlying loneliness in all of us,” says Ramel Wallace, the host of monthly meetup CreativeMornings. “There are not a lot of San Diegans who are born and raised here, so [even those] San Diegans end up being just as lonely as the person who just got here.”
Photo Credit: Blair Kirby
Every month, in local libraries, breweries, and small businesses, there are ambitious social architects who have made a career out of undoing social sads. Extroverted champions of the awkward and searching, they’ve struck gold on in-person connection.
The first moments in a social situation are crucial. Sets the tone and cools the nerves.
At Pitch-A-Friend, singles recruit their close friends to present a slideshow of their dating green flags. The entry points for connection at Pitch-A-Friend are simple, old tech: stickers. Each colored sticker indicates if the wearer is single or taken, queer or straight, or practicing ethical non-monogamy (in a partnership but open to others under a mutual understanding).
At the helm of each showcase is Arielle Fuller, aka Chief Wingwoman, who is making dating hopeful again. As Fuller explains, this takes some of the fear of rejection out of a first interaction. “Putting a sticker on immediately means, ‘I wanted to leave my house and talk to someone, and I am a safe space to come and speak to me,’” she says.
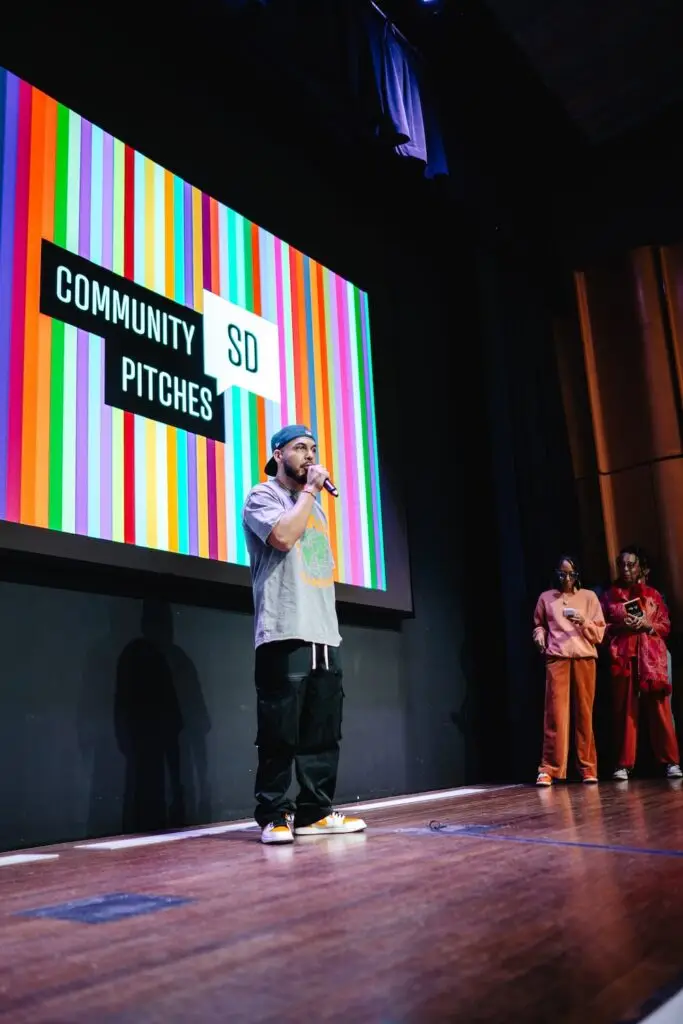
Of course, not all of San Diego’s events designed to make connections are romantic. On the last Friday of every month, hundreds gather at San Diego Central Library for the local chapter of CreativeMornings—an org formed to unite creatives in various cities across the world (designers, artists, writers, producers, performers, architects, etc.).
Photo Credit: Gina Ribando
These aren’t your standard business card swaps, though. Coming from a hip-hop background, host Wallace uses call-and-response to break the fourth wall. “This is not my stage at all, this is our stage,” he says.
In your standard lecture-based meetup, the crowd silently faces the host and acknowledges nobody except those they came with. At CreativeMornings, everyone is encouraged to look around, pay attention to the strangers in the audience—not just the host. Wallace will pull volunteers to read the CM manifesto aloud, and he passes the mic to creatives, who make 30-second pitches to the community about projects they’re working on—and there’s always an invitation to connect and collaborate with the presenters whose ideas struck a chord.
The U.S. Chamber of Connection (yes it exists) says people experience life transitions nearly every year, and in these stretches are more open to forming new habits, relationships, and communities. In a revolving-door city like ours, the transition often comes when someone moves away. In 2023, the Census Bureau reported San Diego had the ninth-highest rates of domestic out-migration in the US.
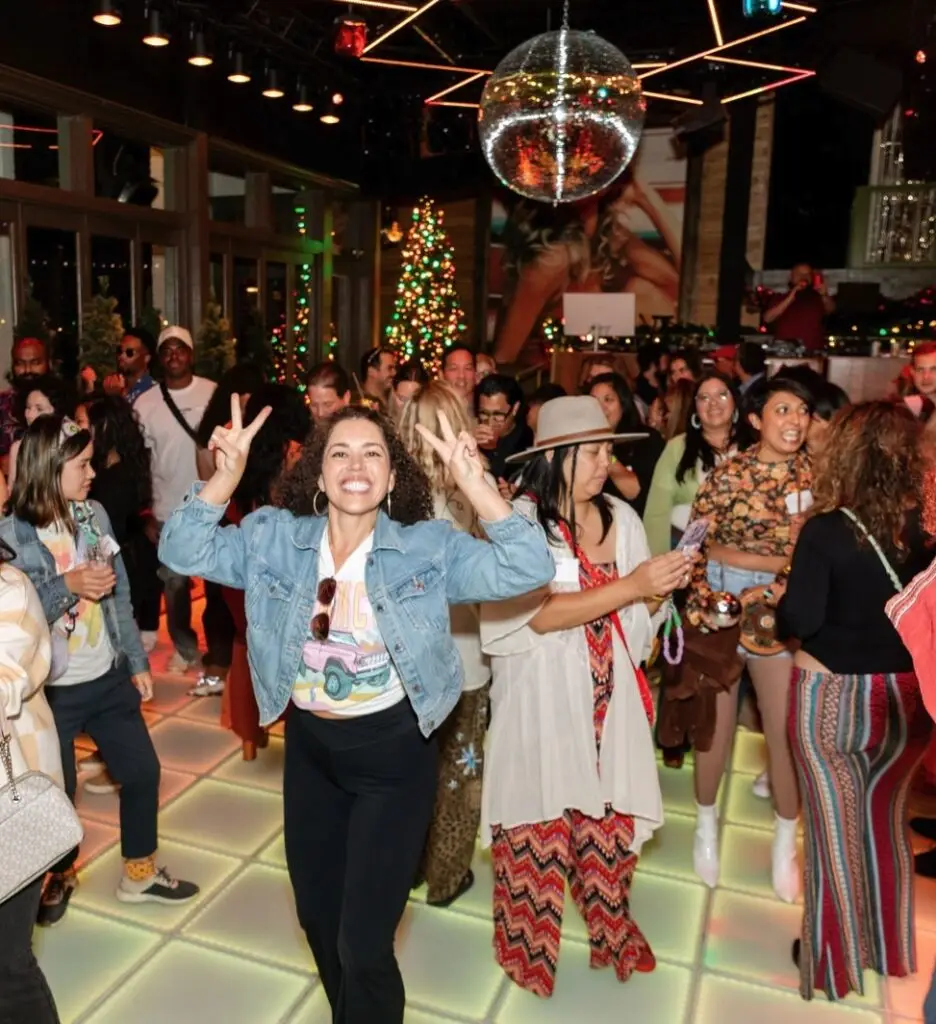
This poses an issue for friendships that IRL SD addresses in monthly friend-making events called 619 Night.
“San Diego isn’t a place a lot of people stay forever,” says Alex Hunter, the creator of IRL SD. “They leave, and people [who stay] lose that community, so they’re hungry for community again.”
Their website describes the vibe as “backyard party meets college fair meets networking event meets happy hour.” Each follows a theme—wellness, sports, refresh and reset, etc.—with related community groups joining as well.
“The people I encounter are trying to get a fresh start in some capacity, so they’re more open, receptive, and ready to meet new friends,” Hunter says. “They need the circle.”
Photo Credit: Elysian Visions by Deaune Boyd LLC
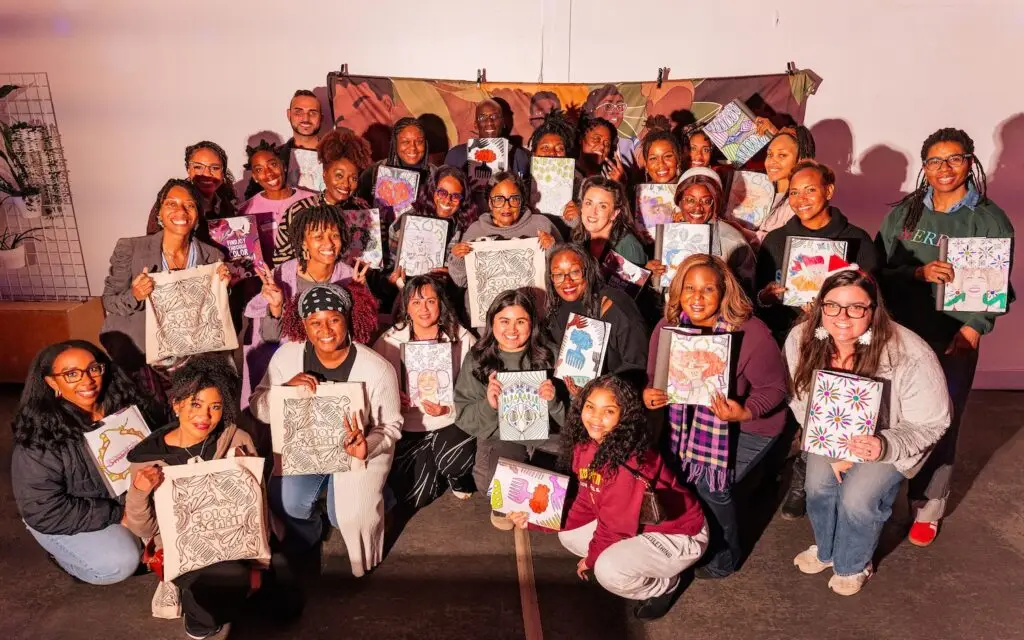
Another way adults can break out of this disconnection is to revert in unison, says artist Elisa Summiel-Bey. The 2015-ish adult coloring book moment in the US was based on some real science, with multiple studies finding coloring has a noticeable meditative and stress-release effect by taking the brain away from anxieties and mental inventories, and focusing it on a simple, easy art. Summiel-Bey’s company Illustrated Melanin throws “Color & Chill” events, turning that trend into a group exercise, along with live DJ sets, wellness experts doing sound baths, and food and drink from BIPOC-owned local businesses. “I tend to think of coloring as your way to tap back into your childlike play,” she says. “As adults, I think we’re almost scared to let loose and have that unabashed joy.”
All of these social meetups attract crowds of likeminded connection-seekers, but high attendance is not the only thing that matters. Metrics nuts can track RSVPs, but spreadsheets can’t capture intangible wins: friendships made, innovative ideas sparked, collaborations kicked off. At CreativeMornings, Wallace redefines ROI as Return On Imagination. Resounding success means thoughtful inquiries over coffee, curiosity about the monthly meeting themes, and requests to take the microphone.
A simple, observable ROI is an increased number of window shoppers to the experience—on the periphery, watching from afar, looking for the right way in. Hunter from IRL SD sees the anxiety in her DMs. “The scariest part for you right now is not meeting new friends: It’s the unknown,” she says. “It’s the gap between ‘I’m here’ and ‘That’s where I need to be.’ If I can help you understand, or get a little bit of a shape around that unknown, it’s much more approachable.”
Courtesy of IRL SD
Being able to bridge that gap, however, depends on your ability to step out of your own mind. “It’s not a connection crisis; it’s a courage and confidence crisis,” says Fuller. The first hello could be as easy as, “Hey, cool shirt.” These are the types of things she includes in her confidence lab reels on Instagram and weekly newsletters.
Ever left a social event and shot straight into a spiral? Was I being weird? Why did I tell that story? I hope that person moves to another state very soon.
The experts say that post-event self-interrogation is a standard-issue part of being alive.
“I love awkward people, and I love being awkward myself,” says Wallace. “It’s humbling to experience: ‘I’m not alone. Finally someone is not put together.’ So give yourself that grace.”
Jeannine Boisse (she/her) is a freelance writer and professional creative with a background in Radio & Television. Based in sunny San Diego, Jeannine spends her time exploring the city's vibrant brewery scene, cooking up new recipes in the kitchen, and connecting with new people.
As summertime inches closer to the shores of San Diego, there are plenty of reasons to be ecstatic. For one thing, there’s the impending arrival of the summer solstice (Sunday), and three days before that, Del Mar’s own Summer Solstice will return for its yearly golden hour. There are also plenty of local Juneteenth events, such as Kinfolk Fest, the Cooper Family Foundation’s Juneteenth Celebration, and The Freedom Table, a new, food-centered event from the originators of Juneteenth San Marcos. We’re also less than three weeks away from America’s 250th anniversary, and the celebrations range from the San Diego History Center’s America 250: San Diego 1776-2026 to NASCAR’s weekend of racing at Naval Base Coronado.
Cbar has planned a week’s worth of festivities to mark its first birthday, and everyone can get in on the fun. The 1-Year Anniversary Week celebrations continue with a special edition of the Sips & Shells craft series ($50) on Tuesday from 6-8:30 p.m., half-off pastries with any purchase of a barista drink (plus an anniversary summer wine flight) on Wednesday and a five-course winemaker dinner on Thursday from 6-9 p.m. ($130). Finally, the birthday bash will conclude with live music on Friday (Will Fedak) and Saturday (Cappo Kelley) from 6-9 p.m.
2917 State Street, Carlsbad
Taste of Little Italy
June 16 & 17
Little Italy’s annual food crawl has so many options that it warrants splitting into two evenings, each boasting a diverse lineup of 20 neighborhood vendors. During the Taste of Little Italy, taking place Tuesday and Wednesday from 4-8 p.m., attendees can make their way from the Piazza della Famiglia to nearby dining destinations for bites like esquites, sausage rolls, hot chicken tenders, and forkfuls of handmade pasta. Each night will also include live music and stops for drinks, desserts, and vegetarian items. Tickets are $71 per day.
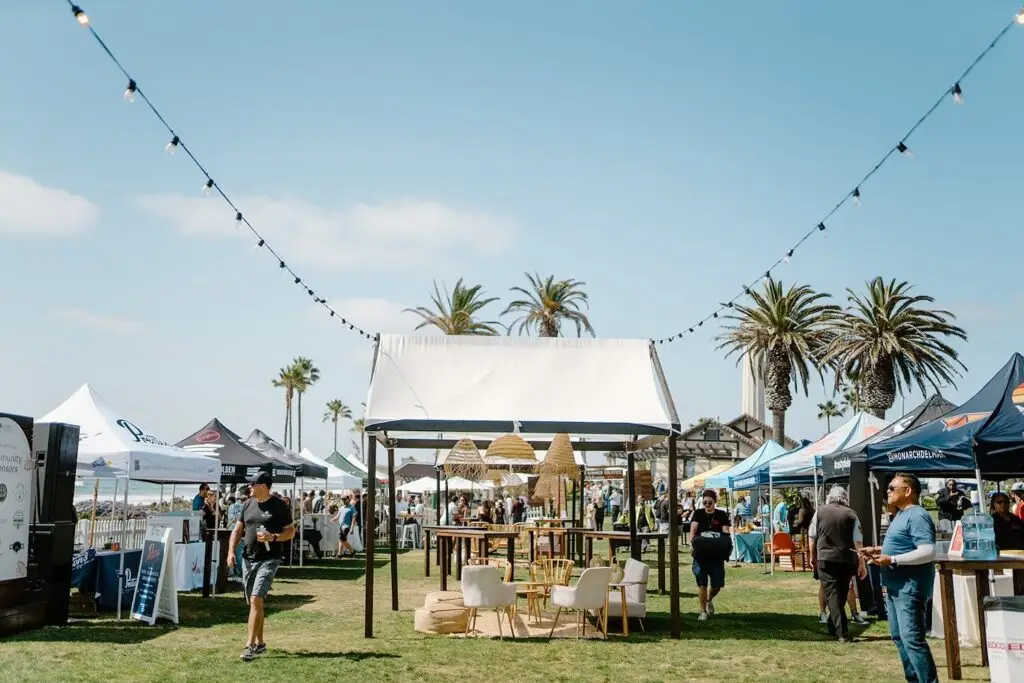
As spring makes its golden transition into summer, welcome the new season with open arms and a big appetite during Del Mar Village’s marquee tasting event this Thursday from 5-8 p.m. With the Summer Solstice celebrating its 20th anniversary, this year’s iteration will include dozens of food and drink offerings from Del Mar Village vendors, soulful tunes from Christian Jules Taylor, live art by Sarah O’Connor, and wave-crashing views at Powerhouse Park. General admission (21+) is $157 and comes with unlimited tastings as well as a commemorative tasting glass, while VIP tickets are sold out; proceeds support the Del Mar Village Association.
1658 Coast Boulevard, Del Mar
The Freedom Table at TERI Campus of Life
June 19
After hosting the first-ever Juneteenth San Marcos festival in 2025, Lionel and Natalie Saulsberry have upped the ante with The Freedom Table, an elevated observance of community, culture, and the culinary arts. This Friday from 4-9 p.m. at TERI Campus of Life, guests can enjoy storytelling, art installations, live music, curated cocktails, and a chef-led dining experience, all in recognition of Juneteenth’s lasting importance. Ticket options include general admission ($261), plus two charitable ticket options: supporter ($313) and impact ($417), with a portion of sales going towards the youth nonprofit Achievement in Motion.
555 Deer Springs Road, San Marcos
Talladega Nights Father’s Day Brunch at ARLO
June 21
In honor of NASCAR’s Coronado debut and Talladega Nights: The Ballad of Ricky Bobby, ARLO is throwing a Father’s Day brunch for the dads who want to go fast. This Sunday from 8 a.m. to 2 p.m., patrons can order from ARLO’s regular brunch menu, as well as a trio of holiday specials: the Dad’s Day Steak and Fries ($64), the Fit For a King Muffuletta Sandwich ($29), and the Big Daddy Brookie ($14). This shake and bake-approved meal will also include a DJ, cigar rollings, whiskey tastings and a Ricky Bobby costume contest. Reservations can be made online.
Ryan Hardison is a freelance arts and entertainment writer and recent graduate of San Diego State. When he's not staring at his laptop, he's likely eating an adobada burrito or getting sunburnt at the beach.
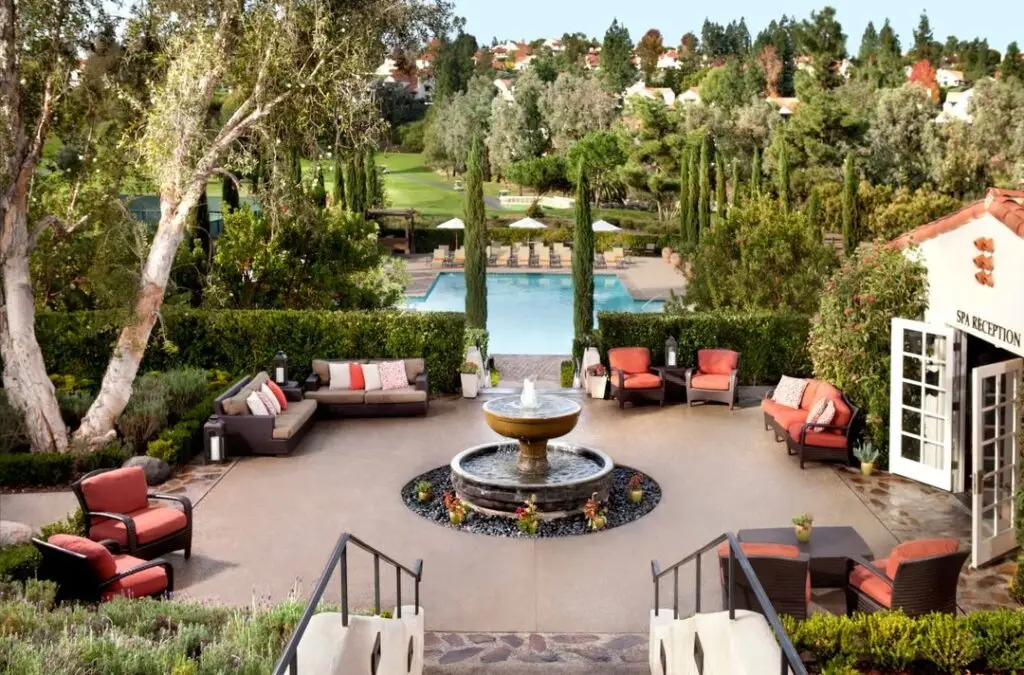
Just south of Lake Hodges near 4S Ranch and Poway, Rancho Bernardo is a suburban community that blends residential neighborhoods with industrial pockets, elevated by a decidedly diverse food scene.
Over 60 years ago, this North County neighborhood was once part of a family ranch. Since that time, big tech companies have taken up residence here, including Amazon, Sony Electronics, Oura Ring, HP, Teradata, and ASML. Rancho Bernardo Inn serves as a community hub, with locals frequently meeting at the hotel’s restaurants, golf course, and spa.
Whether it’s work or a round of golf that brings you to Rancho Bernardo, we’ve taken care of the agenda planning with our guide to the area’s best restaurants, activities, and shops.
Courtesy of Avant Restaurant
Rancho Bernardo Restaurants, Bars, and Coffee Shops
Avant
Sample ingredients plucked straight from Rancho Bernardo Inn’s onsite garden and served at their signature restaurant Avant. One of the neighborhood’s most upscale dining options, they serve a French-inspired menu with nods to California, including many seafood options. Don’t miss their more casual sister restaurant Veranda for al fresco dining.
Wood-fired pizzas and handmade pastas are standouts at The Kitchen, Bernardo Winery’s counter-service restaurant specializing in Sicilian flavors. Charcuterie boards and bruschetta make for great starters or snacks while wine tasting.
13330 Paseo Del Verano Norte
Bushfire Kitchen
Fast-casual and family-owned eatery Bushfire Kitchen recently opened a location in Rancho Bernardo, serving sandwiches, bowls, salads, burgers, protein plates, and housemade empanadas. Bushfire prepares comfort food with healthy ingredients, and offers plenty of vegetarian and vegan options.
11962 Bernardo Plaza Drive, Suite 110
The Cork & Craft
Some might call The Cork & Craft an overachiever. This gastropub has an in-house craft brewery and winery: Abnormal Beer and Wine. The more, the merrier. Their sushi menu is definitely worth exploring, but don’t miss other specialties like garlic noodles, chicken wings, and pork belly.
16990 Via Tazon
Courtesy of Carvers Steaks & Chops
Carvers Steaks & Chops
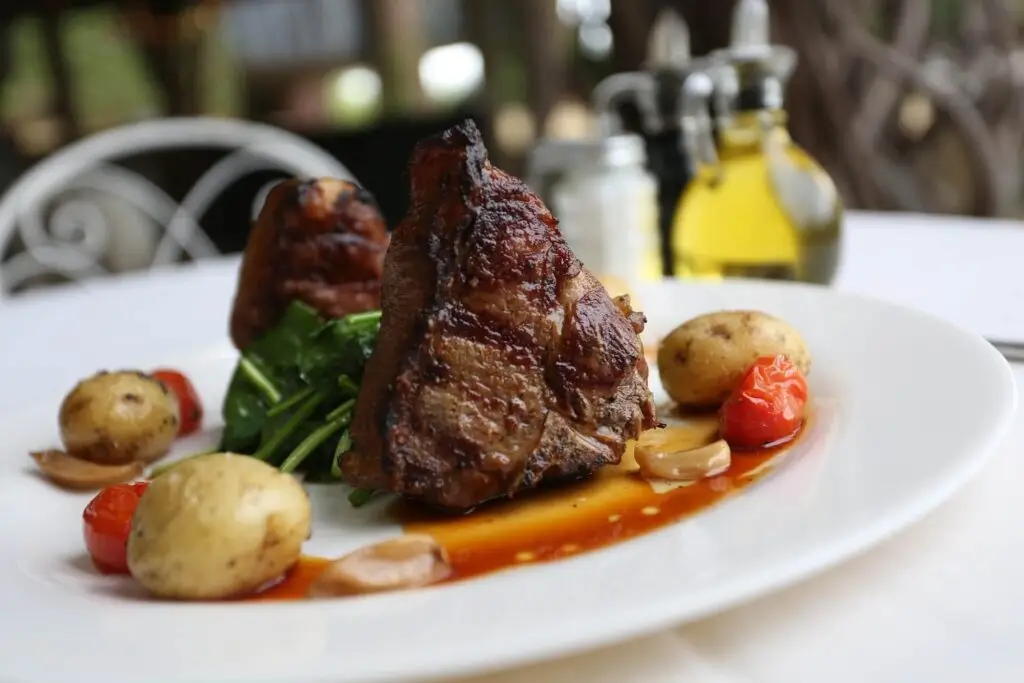
You don’t have to leave Rancho Bernardo to get a white tablecloth steakhouse experience. Carvers Steaks & Chops has prime rib (their best seller), filet, ribeye, porterhouse, New York strip, and other cuts, served alongside crab-stuffed mushrooms, wedge salad, French onion soup, potato skins, and other steakhouse specialties.
1940 Bernardo Plaza Drive
Burma Place
This no-frills Burmese restaurant is known for its traditional tea leaf salad that’s topped with sesame and sunflower seeds, garlic chips, peanuts, tomatoes, jalapeños, fried yellow beans, and fermented green tea leaf dressing. Tucked into a nondescript strip mall, Burma Place is a great takeout option when you want to eat garlic noodles, fried rice, chicken curry, and samosas from the comfort of your couch.
16719 Bernardo Center Drive, Suite A
Phở Ca Dao
Find authentic Vietnamese cuisine at Phở Ca Dao, including favorites like phở noodle soup, vermicelli noodles, broken rice dishes, and spring rolls. One of eight locations throughout San Diego, this family-owned chain uses robot servers for food delivery.
11808 Rancho Bernardo Road, Suite 100
The Kebab Shop
It’s all about the sauce at fast-casual Mediterranean restaurant The Kebab Shop. Smothering your chicken shawarma, gyro, or falafels in garlic yogurt, cilantro jalapeno, fire chili, and dill yogurt sauce is practically a rite of passage. The hardest part is deciding whether to order a wrap, bowl, or salad.
11980 Bernardo Plaza Drive
Casa Lahori
Get a taste of South Asian flavors at Casa Lahori, a Pakistani restaurant noted for its grilled meat kabobs. Other best-selling dishes include beef nihari, chicken biryani, and shahi paneer— best enjoyed with naan bread.
11975 Bernardo Plaza Drive
Kangnam Korean BBQ
Grill your own meat on the tabletop at Kangnam Korean BBQ, an interactive, all-you-can-eat experience that’s well-suited for large groups. Marinated beef bulgogi, grilled galbi short ribs, and spicy pork are served alongside traditional banchan dishes like kimchi, japchae glass noodles, and flavorful stews. Weekday lunch specials provide a nice discount on these filling meals.
11828 Rancho Bernardo Road, Suite 117–119
Courtesy of Curry & More Indian Bistro
Curry & More Indian Bistro
Dig in to your favorite curries and kebabs at Curry & More Indian Bistro. Most entrees are served with a choice of two side dishes, including basmati rice, potatoes with cumin, daal, naan, or mixed greens. Help offset the spice with one of their sweet mango or strawberry lassi drinks.
Kai Oliver-Kurtin is a San Diego-based writer who covers travel, dining, events, and culture. Her writing has been published in USA Today, Condé Nast Traveler, Fodor's Travel, Marie Claire, and HuffPost, among others.
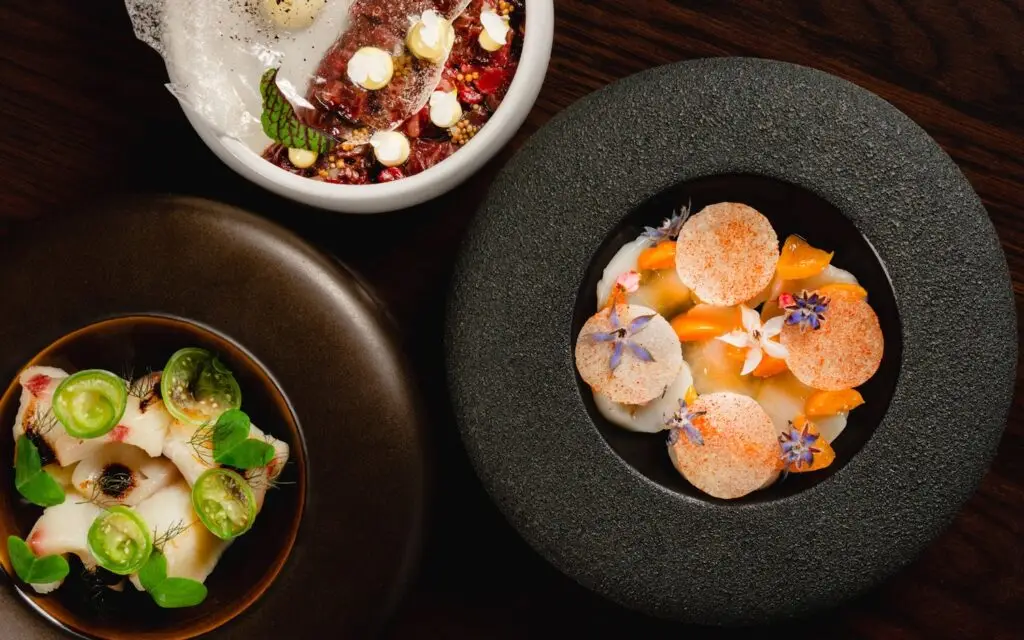
Stake Chophouse & Bar isn’t your average steakhouse. Blue Bridge Hospitality’s Coronado outpost is a modern interpretation of a big-city steakhouse nestled in the heart of the small coastal community. The team at Stake has reimagined the whole steakhouse experience. By prioritizing a seasonal farm-to-table sourcing philosophy, a personalized guest experience, and unique service touches, like a formal steak presentation and a bespoke knife selection process, Stake distinguishes itself in a sea of steakhouses.
Exceptional steaks, including Wagyu from Japan, Australia, and the U.S., and fresh seafood flown in daily form the core of Stake’s culinary identity. The menu features a five-course omakase-style steak experience highlighting house favorites, plus an array of cuts, and classic steakhouse staples—think a wedge salad, baked potato, or pasta carbonara—refined for a contemporary palate without losing their traditional appeal. Stake focuses on seasonal sourcing from the region’s best family farms and specialty purveyors, and incorporates intentionally unexpected touches to create something truly unique.
“I challenge our chefs and myself to take it a step further in sourcing,” says Chef Ronnie Schwandt. “It’s important to us to highlight different farms, unique one-off farms—whether it’s cattle, strawberries, a local fisherman or from anywhere in the United States, we’re always trying to find that niche.”
Beyond the menu, Stake emphasizes outstanding service, says Vinny Spatafore, Director of Hospitality Operations. Staff maintains detailed notes, allowing them to remember guests by name, recall previous orders such as a favorite martini (also memorable for the customer since it’s served in an extra tall, distinctly-shaped glass), and celebrate special occasions like birthdays and anniversaries.
“When you have those points of topic that you remember about a guest, they appreciate that,” he says. “Our servers are really good with that—we have a couple servers who have been here since the beginning and they’ll remember somebody from years ago, their name, their kids’ names, where they live. I’m really thankful to have a great front of house staff.”
Award-winning wines, rare whiskeys, special events, and a complementary black car service that provides transportation for guests throughout Coronado add to Stake’s appeal.
Schwandt stresses that Stake offers more than a meal; they aim to give patrons something unforgettable.
“It starts when you walk up the stairs and are greeted by the hostess—that sets the tone for the night. Then you’re greeted by a server, who may know you by name, and can guide you through the menu and curate as they get to know you,” says Schwandt. “Most people leave kind of blown away; they leave feeling like they just had an experience. That’s the goal, right? Whether you’re serving smash burgers or high-end steak, you want somebody to leave thinking, Wow, that was awesome.”
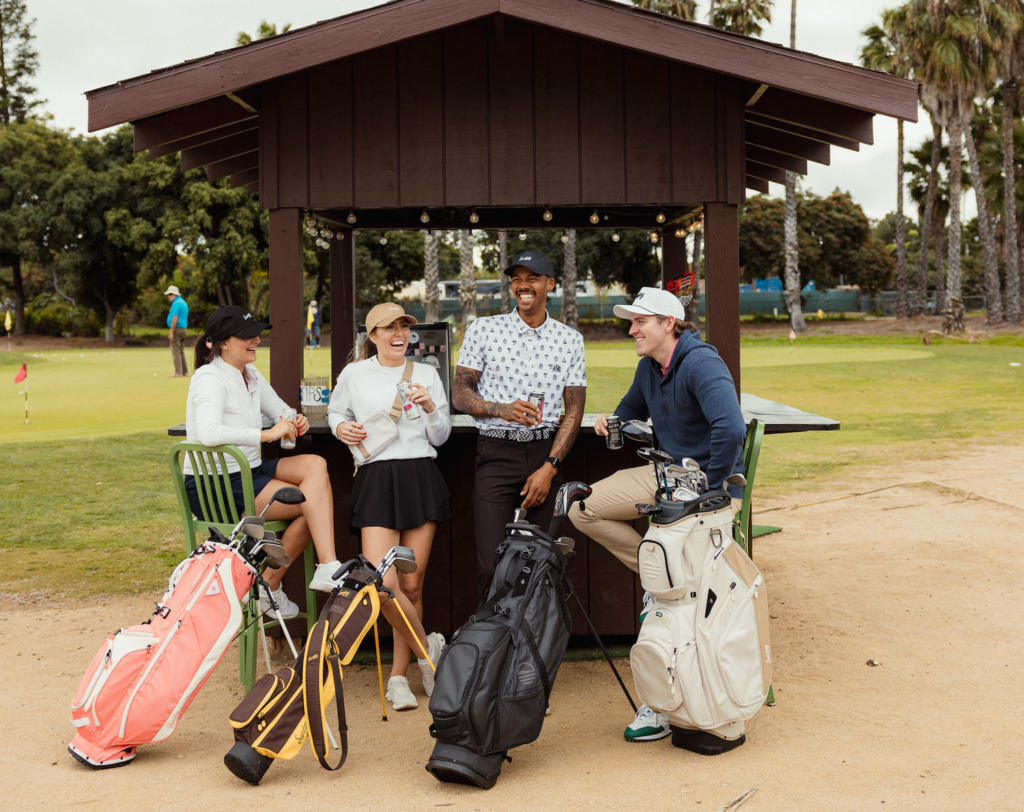
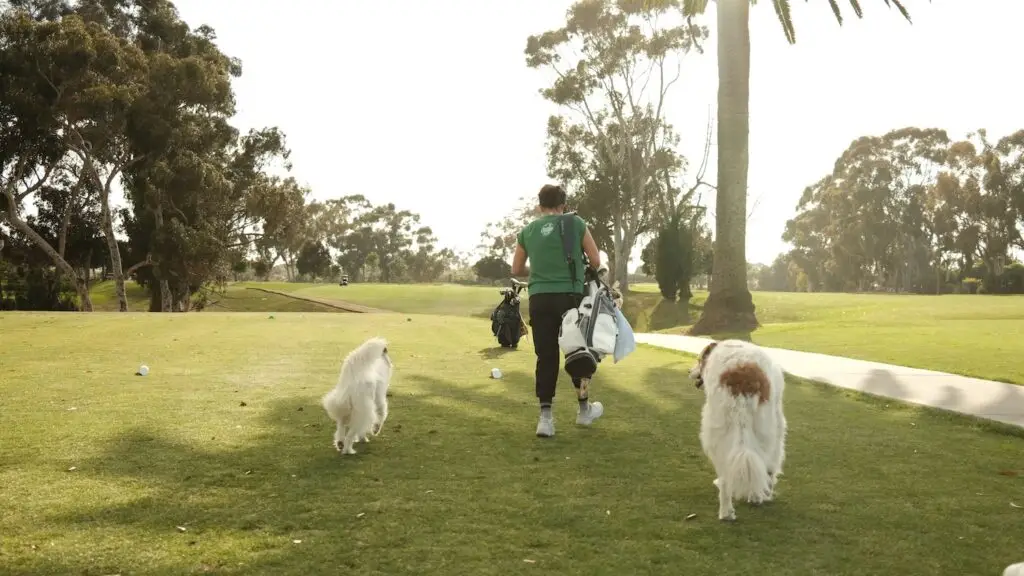
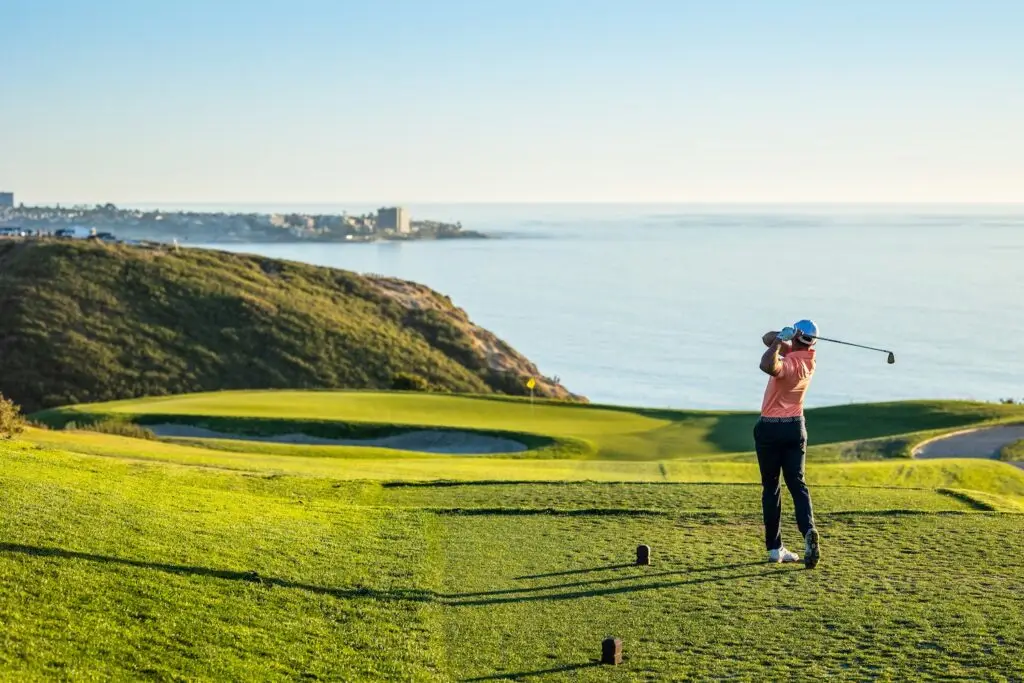
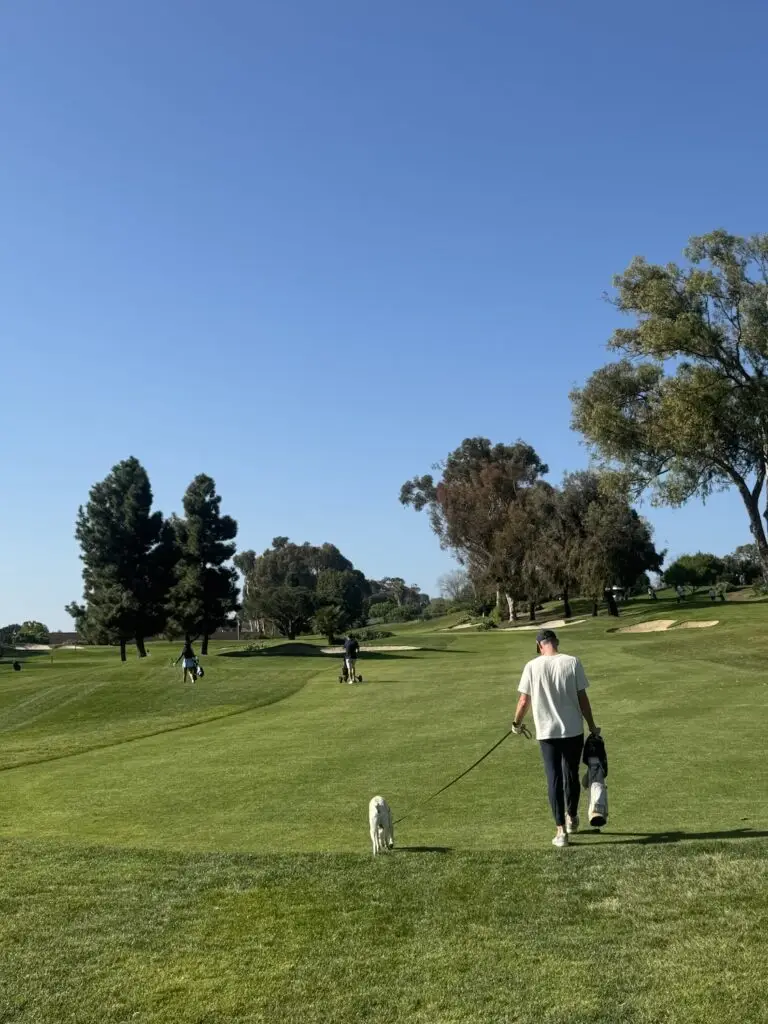
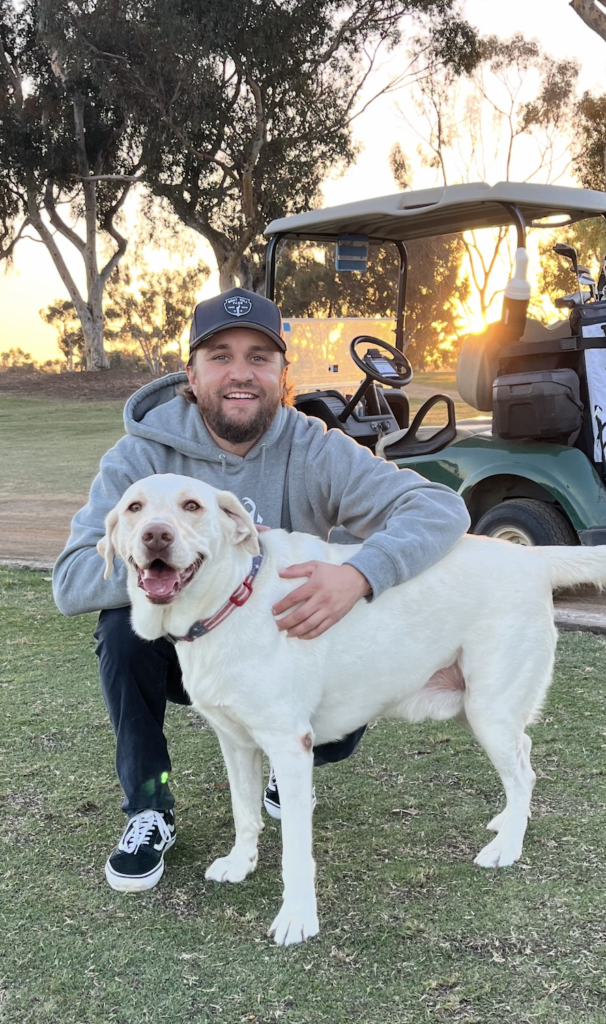
Golf doesn’t have to mean stiff collars, pleated khakis, whisper-talking on the green, or pretending your sand trap fails aren’t actually hilarious. Around San Diego, a handful of rebel courses are quietly rewriting the rules of an afternoon round, making them more relaxed, more social, and yes, more dog-friendly. These are the fairways where leashed pups pad alongside their people; where a suspenseful search for a golf ball in the bushes or—no!no!no!no!no!—in the water hazards are part of the fun; where every polite golf clap comes with a smiling, panting audience. If your ideal golf day includes a walk, a drink, and your dog riding shotgun, this is your teeing ground.
For proof that a golf course can be approachable without being boring, look no further than Emerald Isle Golf Course in Oceanside. The executive course delivers consistently beautiful greens, rolling elevations, and just enough challenge to keep you engaged, not stressed—unless your pup breaks free and runs for the rolling elevations, in which case you’ll be very engaged and maybe a little stressed. Locals love holes like the canal carry on No. 3 and the wildlife-dotted pond on No. 16, while golden-hour sunsets steal the show most evenings. Dogs are genuinely welcome here, not an afterthought. Grab them a slice of watermelon from the clubhouse, pose in the cart for Instagram cameos with an Emerald Isle scarf (it doubles as an adorable bandana for your four-legged friend), or introduce them to the course’s resident pups like Bogey, the assistant director of instruction, and shop dogs Karl and Frank. Affordable, friendly, and no-frills, Emerald Isle feels like golf you and doggo can’t wait to play.
660 S El Camino Real, Oceanside
Courtesy of The Loma Club
The Loma Club, Point Loma
The Loma Club is where golf goes social. Set in Liberty Station, this historic 9-hole par-3 course trades country club stiffness for an easy, neighborhood energy that feels distinctly San Diego. The course is walkable and unintimidating, with skyline and harbor views doing most of the heavy lifting. The Loma Club is just dipping its paws into the dog-friendly trend, and welcomes them on the mini course and off the fairways. Though your pup is the epicenter of your world, the patio at Loma Club is the real star, hosting live music, trivia (even the smartest dogs are stumped), and cocktails that rival golf itself. You don’t even need clubs to enjoy it. Show up with your dog, wander the course, grab something from the clubhouse, and stay for hours. You’ll feel like you’re exactly where you’re supposed to be.
Calling Goat Hill Park a golf course almost undersells it. Known as the “People’s Park,” this historic Oceanside staple operates more like a community space where golf happens. Expect dogs strolling alongside the players, music streaming from magnetic speakers attached to golf carts, beginners smacking balls alongside serious talent, and locals and tourists sharing the same teeing grounds with a few four-legged besties trotting alongside. Saved from redevelopment in 2014, Goat Hill embraces a raw, unpolished look that’s both intentional and refreshing. With ocean views, a “19th-hole” fire-pit, and zero pretense, it’s golf at its most human…because: dogs.
2323 Goat Hill Dr, Oceanside
Courtesy of Omni La Costa Resort & Spa
The Club at Omni La Costa, La Costa
Ready to add your pup’s name to the illustrious list of golf greats? Same. At the iconic The Club at Omni La Costa, the vibe is equal parts championship-caliber and casually fabulous. Emerald fairways so perfect you’ll hesitate to step on them, palm-lined paths practically begging for a golden-hour strut, and rolling greens that ripple in the sun. And just when you thought it couldn’t get any better, your four-legged plus-one enters the chat: For members and overnight guests, the La Costa lifestyle rolls out the (very chic) welcome mat for your (leashed) pup, turning tee times into a social affair of breezy, citrus-kissed luxury and leisurely strolls. Really—what are you waiting for? Even your dog’s got a standing invite.
Isabella Dallas is a freelance writer for San Diego Magazine and the Arts and Culture Editor at The Daily Aztec in her final year at San Diego State University. She previously worked as an editorial intern for SDM, but when she’s not writing, you can find her trying the best coffee spots in SD, devouring the latest rom-coms, and indulging in anything and everything pop culture.
When three nations and 16 cities come together to host the FIFA World Cup 2026, the scale stops feeling like a tournament and starts feeling like geography. A continent becomes the stage as borders soften into corridors. And Southern California—shaped by migration, sport, entertainment, and constant movement—sits inside that landscape with all eyes on it.
San Diego and Los Angeles have always felt connected. Hop on the Pacific Surfliner, and the trip unfolds in one continuous stretch of coastline, passing beach towns, neighborhoods, and city centers.
Traveling from San Diego, everything still feels slightly suspended as the Pacific Surfliner follows the coast north with ocean on one side and a slow suburban blur on the other. San Diego stays in exhale. Los Angeles is already building toward something louder.
This summer, Los Angeles will host eight matches of the FIFA World Cup at Los Angeles Stadium, including the US Men’s National Team opener on June 11, while the region stretches into 39 days of programming across stadiums, parks, transit hubs, beaches, and neighborhoods. Instead of one massive fan hub, Los Angeles is embracing a citywide celebration, with fan zones spread across its entirety.
But this pattern has been rehearsed here for decades. In 1994, Southern California became one of the defining stages of the World Cup, when matches at the Rose Bowl placed global attention on the region and turned local stadiums into international landmarks, confirming its ability to hold the world at scale.
What distinguishes Southern California is not just infrastructure, but cultural permeability. Fashion, music, film, art, and sport constantly overlap here, creating an environment where identity is flexible and always in motion. From the Venice boardwalk, where skate culture shaped modern street style, to global soccer stars rubbing shoulders with Hollywood celebs, to authentic Spanish cuisine moving up and down the I-5 corridor, everything circulates.
The World Cup is not introducing anything new here, it’s showing up for the summer and showing out, revealing what this city has always known about itself. What follows is a look at the fan zones and how Los Angeles turns itself into a city-wide stage for the tournament, one neighborhood at a time.
Courtesy of Los Angeles Tourism & Convention Board
Los Angeles Union Station
As the heart of Los Angeles, Union Station is an official Fan Zone June 25-28 during the World Cup, but in practice it never really stops being one.
It is the city’s circulation point, its meeting ground, its pressure valve. Commuters, travelers, match-day crowds, and everyday Angelenos all move through the same space, and everything mixes, overlaps, and scales in real time. In a way, this is where the World Cup stops arriving in Los Angeles and starts moving through it.
The Pacific Surfliner from San Diego to Los Angeles makes that shift feel almost too easy. No stress or gridlock anxiety, just a straight line up the coastline with ocean on one side and everything slowly becoming more built on the other. It’s one of the rare ways into LA that doesn’t feel like arrival as friction. You can sit with a laptop, watch the Pacific drift past, grab coffee from the café car, and let the city come to you in pieces.
That’s the beauty of arriving at Union Station. Instead of feeling like you’re on the edge of the city, you’re immediately surrounded by it. And, inside, the station already reads like a World Cup nerve center: banners, movement, multilingual energy, the sense that something global is about to funnel through this exact point. The Heart of the City Fan Zone only sharpens that feeling, with simultaneous match screens, DJ sets, meet and greets, and immersive activations built around marquee games like USA vs. Türkiye.
ROW DTLA feels like the first exhale after arrival. A converted industrial campus turned creative district where restaurants, retail, and open-air courtyards form a self-contained ecosystem. If you’re looking for the perfect first meal in LA, make it lunch at Pizzeria Bianco. The thin-crust pizza is reason enough to go, but the space leaves just as much of an impression.
What I liked most about ROW DTLA is how quickly it resets you after the train. One minute you are stepping off at Union Station, and the next you are in a space that feels like its own version of LA, a city inside a city with some of the most curated shopping I’ve ever seen.
Bodega hides itself behind a convenience-store front, a sneaker and streetwear space disguised as something ordinary, like LA refusing to make anything feel too obvious. The whole campus moves like that, part retail, part gallery, part neighborhood you are only temporarily inside.
Isabella Dallas is a freelance writer for San Diego Magazine and the Arts and Culture Editor at The Daily Aztec in her final year at San Diego State University. She previously worked as an editorial intern for SDM, but when she’s not writing, you can find her trying the best coffee spots in SD, devouring the latest rom-coms, and indulging in anything and everything pop culture.
While glucagon-like peptide-1 (GLP-1) receptor agents have been used to treat Type 2 diabetes for more than 20 years, their recent emergence as weight-loss wonder drugs marked a new frontier in medicine. But their effectiveness has left some patients wondering what to do once they’ve reached their goal. Stopping the medication could mean regaining some, if not all, of the weight. A Scripps Clinic internal medicine physician recently conducted a small study of whether GLP-1 patients who had reached their goal weight could maintain that weight by taking their regularly prescribed injection every other week instead of weekly. Spoiler alert: 30 of 34 patients did. Read more about the study here and what that may mean as pharmaceutical companies roll out oral GLP-1s.
For more nutrition, wellness, and healthy living tips, sign up for the San Diego Health newsletter here.