


Storybook Soirée

Styled by Erin Zlotnik of the Library Shop and Natalie Gill of Native Poppy Floral Design; calligraphy by Paperweight; modeling by Norah Zlotnik; catering by Monello
Get the Look:
The Menu: Handmade ravioli in a truffle cream sauce, cauliflower florets with cheese sauce, three-cheese white pizza with mushrooms, and gnocchi with Gorgonzola
The Drink: Milk garnished with nutmeg and cinnamon
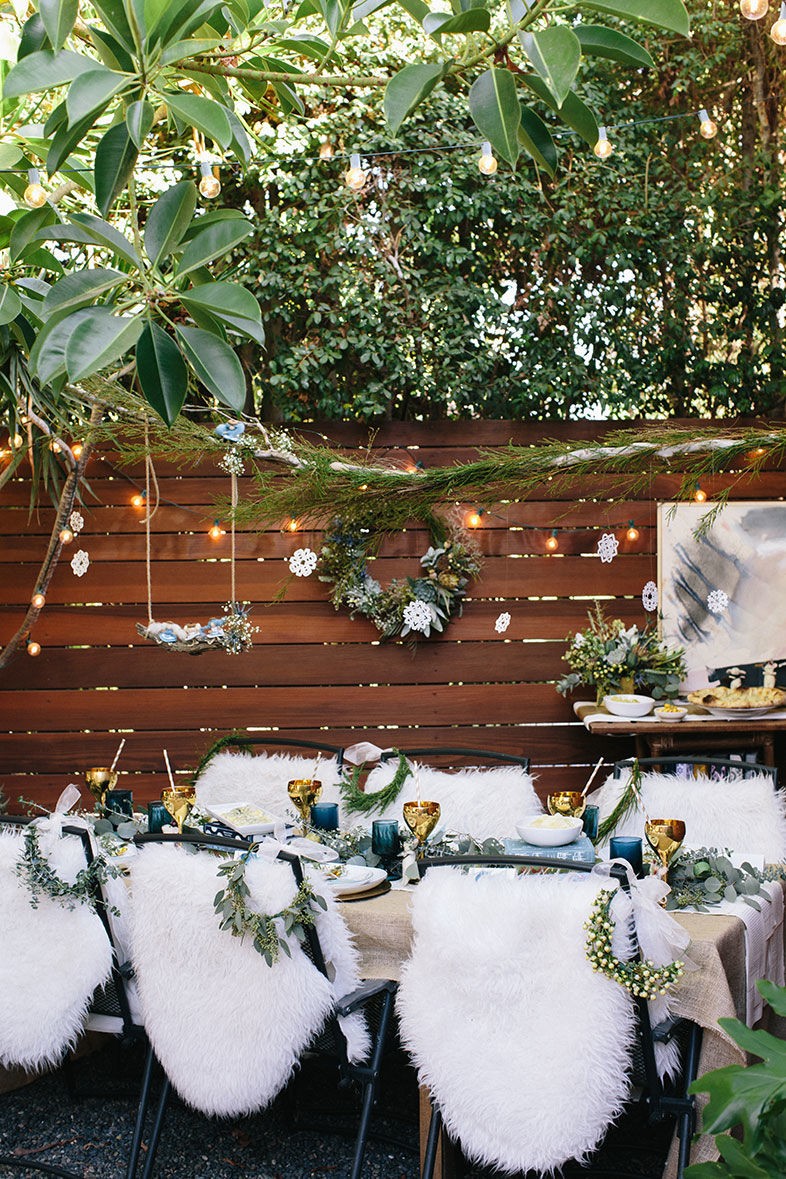
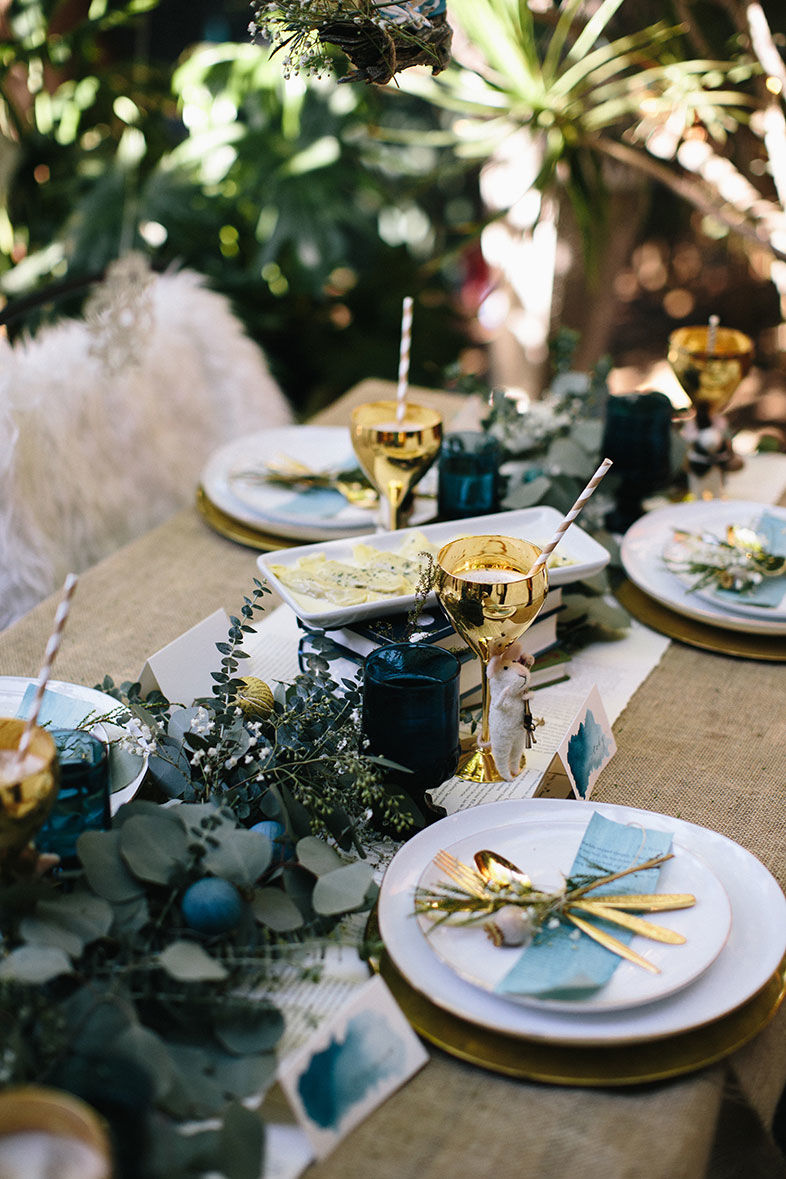
The Table: Inspired by the children’s fairytale The Snow Queen, the literary inspiration for Disney’s Frozen, Erin Zlotnik and her team designed a table for little ladies with big imaginations. Evergreen twigs and eucalyptus boughs—all sourced from local foliage—add a forest-like feel, while stacks of colorful classics and a runner and snowflakes made of old book pages anchor the theme. They kept the food winter white. As for the menu, “children love cheese,” says Valentina Di Pietro of Monello. “It makes vegetables more interesting for the young palates.”
Tip: Erin says, “Just because it’s a children’s party doesn’t mean the décor needs to involve primary colors and paper plates. Once kids are school-aged, they can handle real dishes, which add sophistication and elegance, even if you’re serving pizza.” (Dishes from West Elm and Hostess Haven)
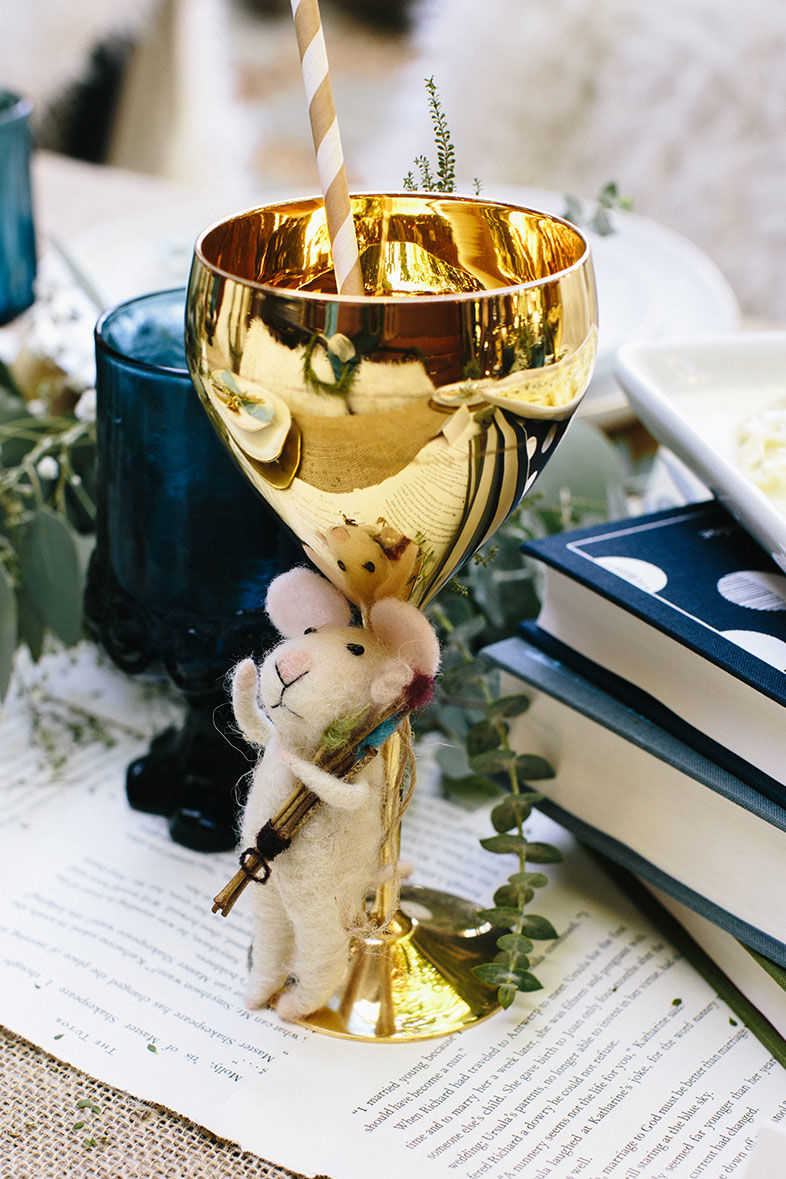
Storybook Soirée
Mice ornaments by Roost can double as décor and party favors (available at the Library Shop).
Storybook Soirée
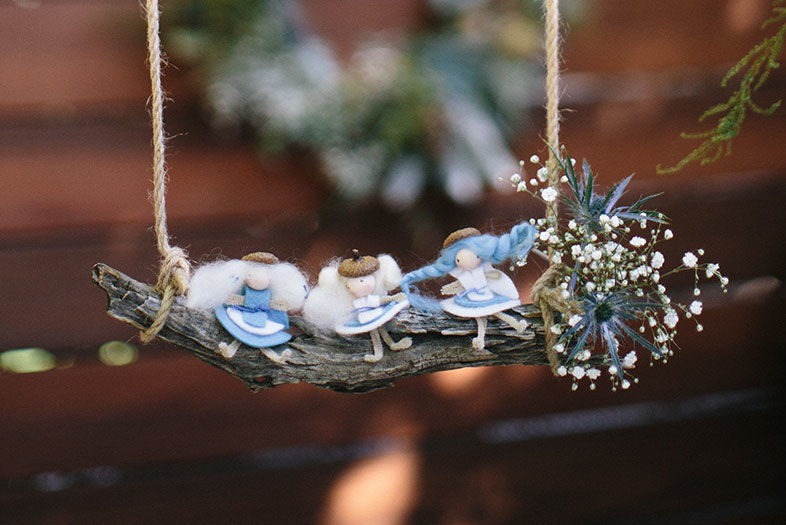
Make Your Own Woodland Fairies
Supplies needed to make two fairies:
- 2 wood beads for the fairy heads
- 2 brown or tan pipe cleaners
- merino wool hair (can also use soft, loose yarn)
- wool felt in at least 2 colors; cut these into 2 circles with a 2-inch diameter and 2 circles with a 3-inch diameter to use for the skirt and 2 rectangles in either color about 2 inches in length that will be used for the shirt. Cut two small wings out of felt, about 2 inches wide.
- cotton floss
- 2 acorns for the fairy hats
To assemble:
1. Bend pipe cleaners so that the 2 ends are on top. On either side come down about an inch and pinch the pipe cleaners into arms. Continue down the pipe cleaner and pinch 2 legs with a U-shaped gap in between. Take the top ends of the pipe cleaner once arms and legs have been formed and twist together to form a neck.
2. Cut small holes into the middles of the felt circles. Pinch the two legs together to fit into the small hole of the smaller circle and push the circle up to the fairy’s waist. Take the larger circle and do the same to form the lower part of the skirt.
3. Cut a slit into the middle of the felt rectangle and slide it over the fairy’s neck. This will be the fairy’s shirt. Take a small piece of cotton floss and tie it tightly around the fairy’s waist to secure it over the skirt. Trim the ends.
4. Adhere the hair to the fairy’s head with glue. You can style it any way: braids, buns, or loose. Use the additional cotton floss to secure hairstyles.
5. Once the hair is securely attached, fill the acorn top with glue and press onto the top of the head. Hold in place for 30 seconds to adhere.
6. Put glue in the center of the felt wings and glue to the back of the fairy, pressing down to adhere.
Your fairy is complete. Enjoy!
Editor’s note: If these seem to ambitious, start with the Pied Piper Craft kit for woodland fairies. Available at the Library Shop. 330 Park Boulevard, East Village
Storybook Soirée
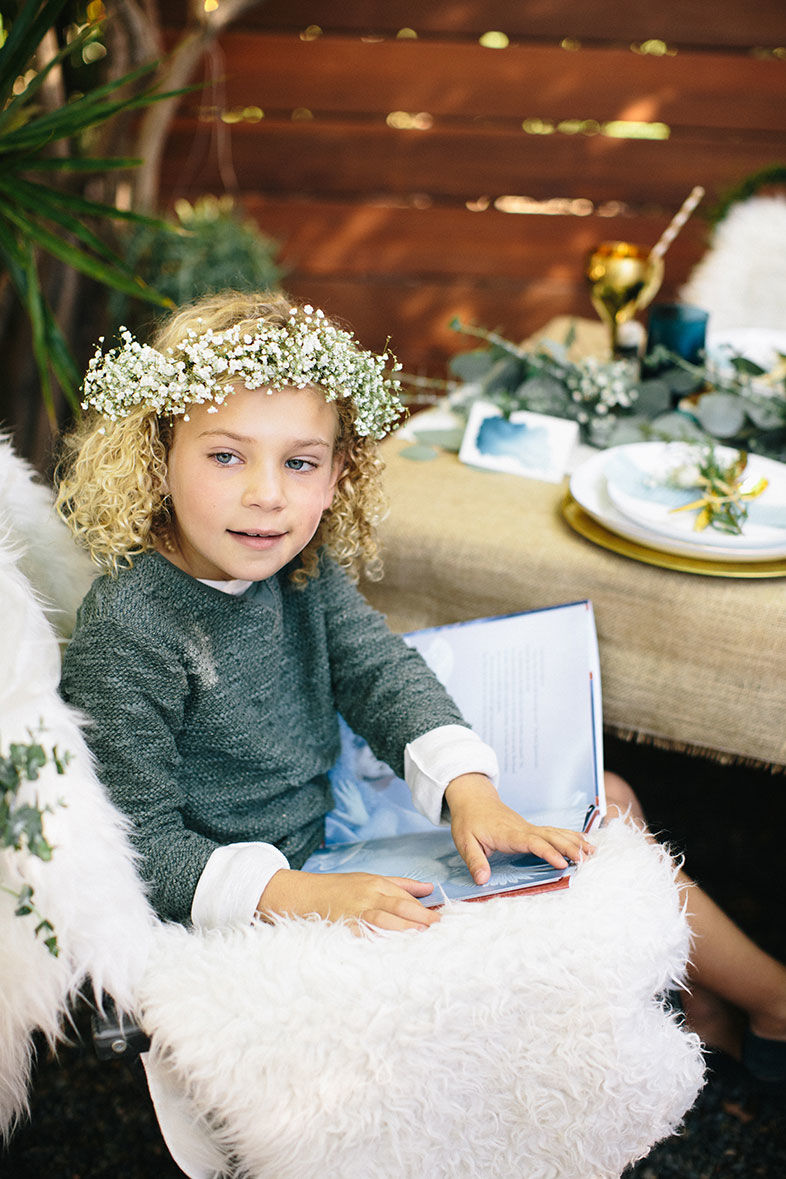
Make Your Own Floral Crowns
1. To create the tiara frame, take a piece of 18-inch floral wire and make a half-inch diameter loop at both ends by bending and twisting the wire at each end. (Floral wire available at factorydirectcraft.com)
2. Starting at one end of the wire take a small bundle of eucalyptus leaves or baby’s breath and securely attach it with the flower or leaves pointing toward the wire end with floral tape. No need to cut the tape—simply place another small bundle of foliage over the taped stems and wrap the tape around the new bundle’s stems to secure it on. Repeat this until the whole wire is covered. (Floral tape available at papermart.com)
3. Finish by threading an 18-inch silk ribbon through the two holes on the ends of the wire and then tie into a bow.
Voila!
Storybook Soirée
More tips from Erin Zlotnik of the Library Shop:
1. Let your kids help with the décor. Children six or older can easily cut snowflakes like the ones used in the shoot. We used old book pages (from books we would have otherwise donated); you could also use children’s art or newspaper. Let the kids cut snowflakes in varying sizes that you can string onto fishing wire and string as a garland to hang in a room or on a tree.
2. Flowers don’t need to be elaborate arrangements. We used boughs of eucalyptus loosely strewn down the middle of the table in lieu of more formal vases. Short branches of greenery allow you to decorate around other fun items like the stacks of classic books used in this party. Plus, you can find greenery to use around San Diego or even in your own backyard.
3. Kids’ parties always run more smoothly if you have at least one craft to keep them busy for 20–30 minutes, in addition to eating, presents and games. It’s a good way to break the ice when people are still arriving. Making floral crowns, cutting book page snowflakes, or assembling little felt fairies would all be simple crafts that kids 6-12 could do with minimal initial direction from an adult or parent, and each offers kids the opportunity to turn their creativity loose.

Storybook Soirée
